Upper Timing Cover Replacement
Do-it-yourself guide for replacement of the upper timing cover for the VW Mk7 Golf R and GTI.

The plastic timing cover on my 2016 Volkswagen Golf R was leaking. Well, not exactly leaking but a slow annoying weeping of motor oil around the cover that hides the intricate mechanical timing components of the 2 liter four-cylinder turbocharged engine.
I tried the usual steps to remedy this common problem area of the Volkswagen Mk7 (and prior) Golf platform: tightening the cover bolts and making sure my positive crankcase ventilation (PCV) system was functioning properly. Alas, oil would still make its way past the seals and throughout my engine bay.
After purchasing a new upper timing cover and seals and spending about 2 hours time on installation, I was able to resolve the issue. In this post I'll be going over everything you need and some helpful tricks in order to resolve this common issue.
Parts Required
ShopDAP has a Upper Timing Cover Reseal kit that will provide all the hardware needed for this job. The total price of this kit is $99 plus tax.
 Sign In
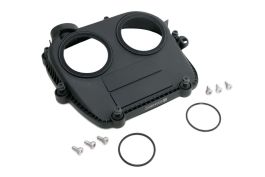
The individual part components are as follows:
| Part | SKU | Quantity |
|---|---|---|
| M6x14 Torx Screw | N10751201 | 6 |
| Seal for Cam Magnet | WHT007212B | 2 |
| Upper Timing Cover | TCV0137 | 1 |
A new upper timing cover will come with the seals already affixed, which is convenient. Do make sure the seals are seated properly on the cover before installing on your vehicle. You may or may not be able to get the seals themselves without the plastic cover. I did not go this route but it may be viable as long as your cover has not warped.
The two seals for the camshaft magnets are optional, but are a good idea to do while you have the upper timing cover off and have access to them.
Technically, the torx screws are one time use and it is advised to get new ones.
Tools Used
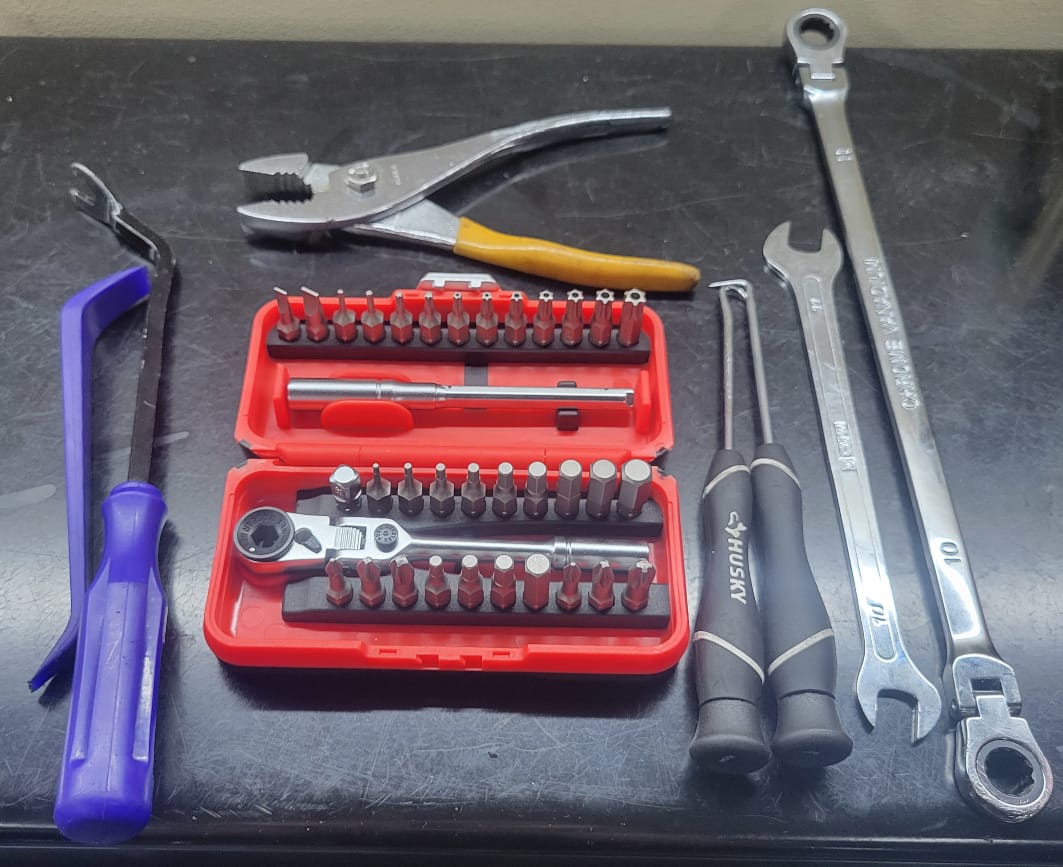
The Harbor Freight ICON Locking Flex-Head Ratchet and Bit Set is key to a successful DIY job. The torx bits on the upper timing cover and two cam magnets are in a tight position as they are very close to the engine mount. This ratchet with its pass-through bit design allows access to these areas without needing to remove the engine mount (which would also require properly supporting the engine).
Another tool that is helpful is a thin 10mm open-ended wrench. I am a fan of this super thin set of wrenches by Capri Tools that comes in 7 different sizes. During my research, some individuals had found success with a long ratching box end wrench. I would advice against this. The two bolts on the bottom come very close to the engine mount as they are backed out. You may get stuck with a box end wrench due to the limited clearance there.
Other tools include: a pick set to remove the cam seals, a set of pliers to remove a coolant hose coming from the expansion tank, and trim tools to pry the cam magnets from the upper timing cover.
Upper Timing Cover Removal and Install
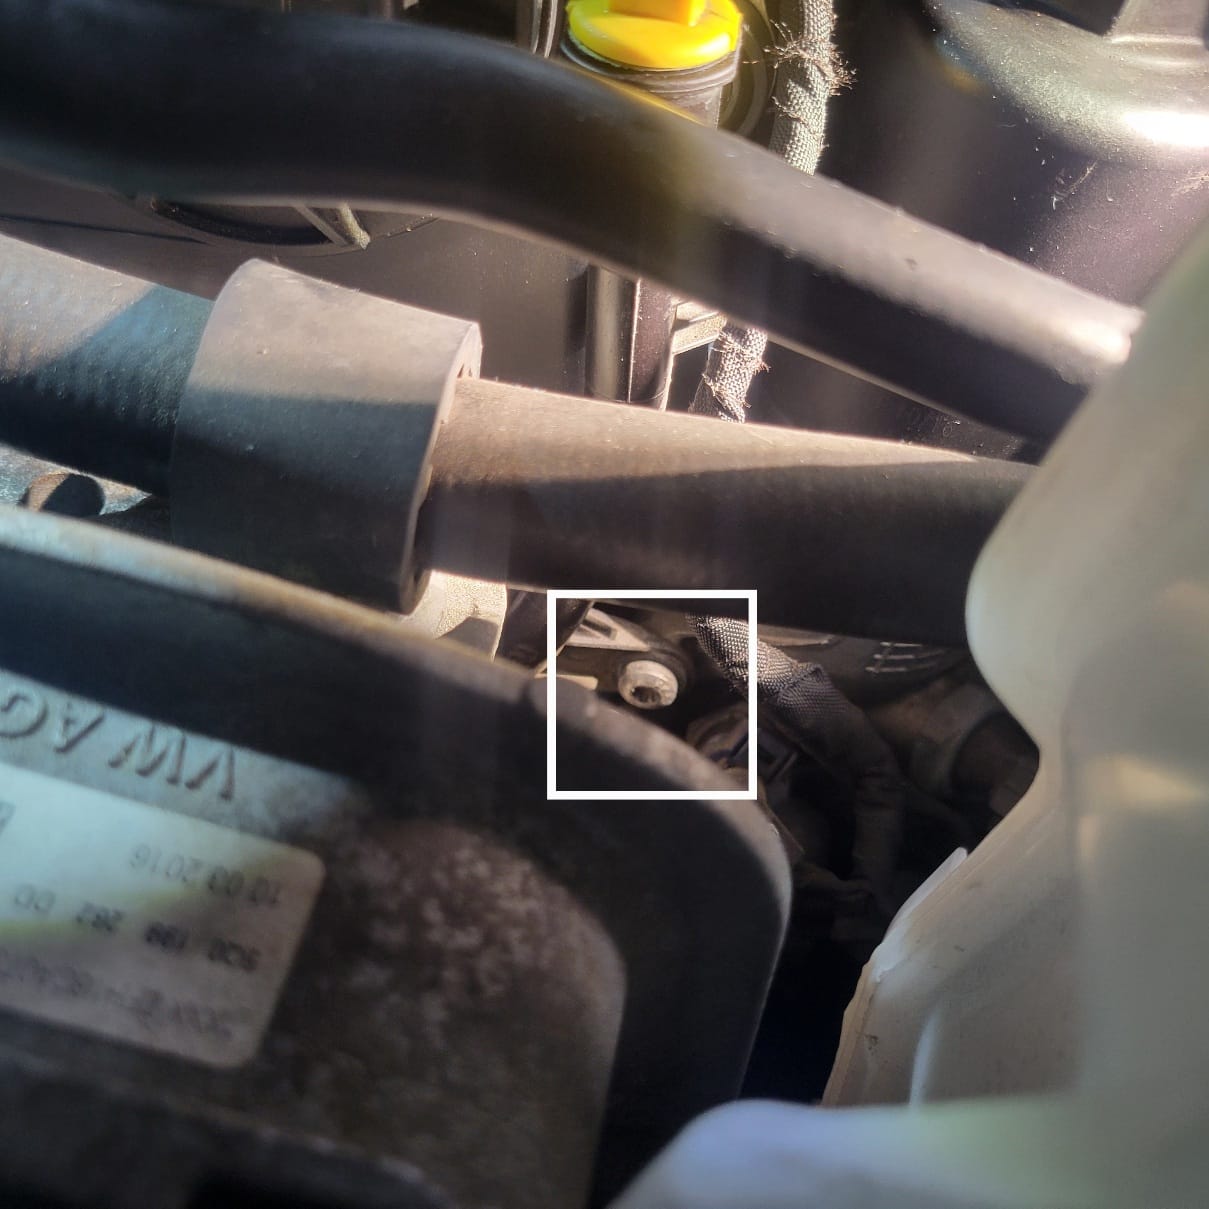
Slide the hose off the metal barb shown in the above picture. You will also need to unbolt the metal barb to give clearance during removal of the cover.
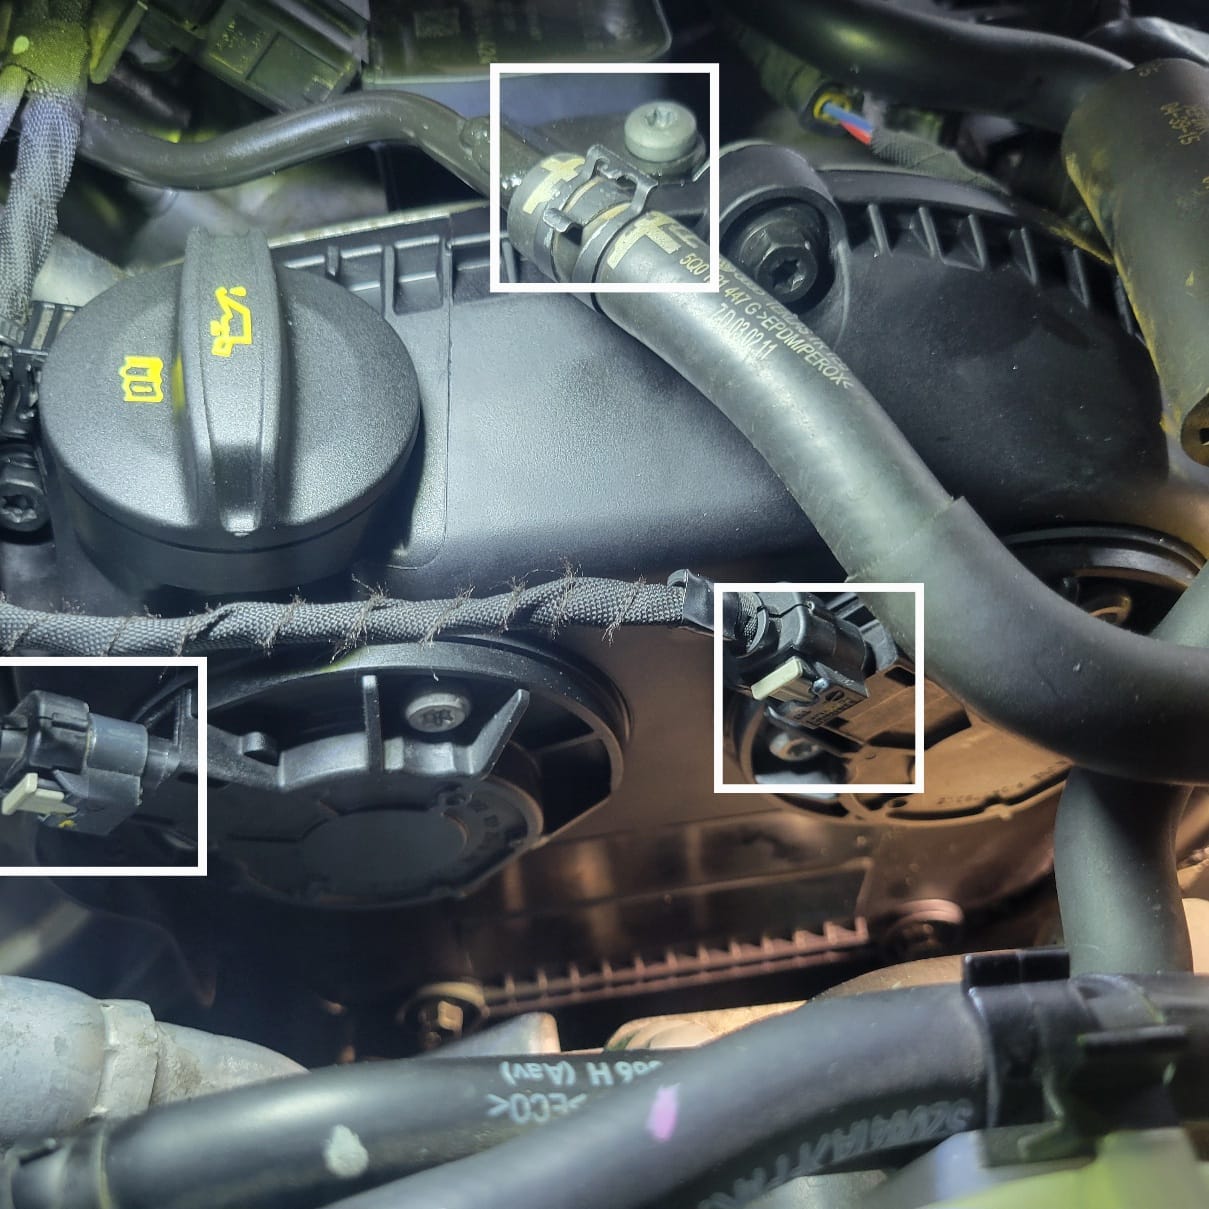
To remove the connectors on the two cam magnets, take a pick and push the clip up. Then press the clip down and pull the connector out.
Next you will need to unbolt the oil dipstick tube to give you more space while removing the cover. You do not need to remove the dipstick itself. You can see the bolt in the above picture.
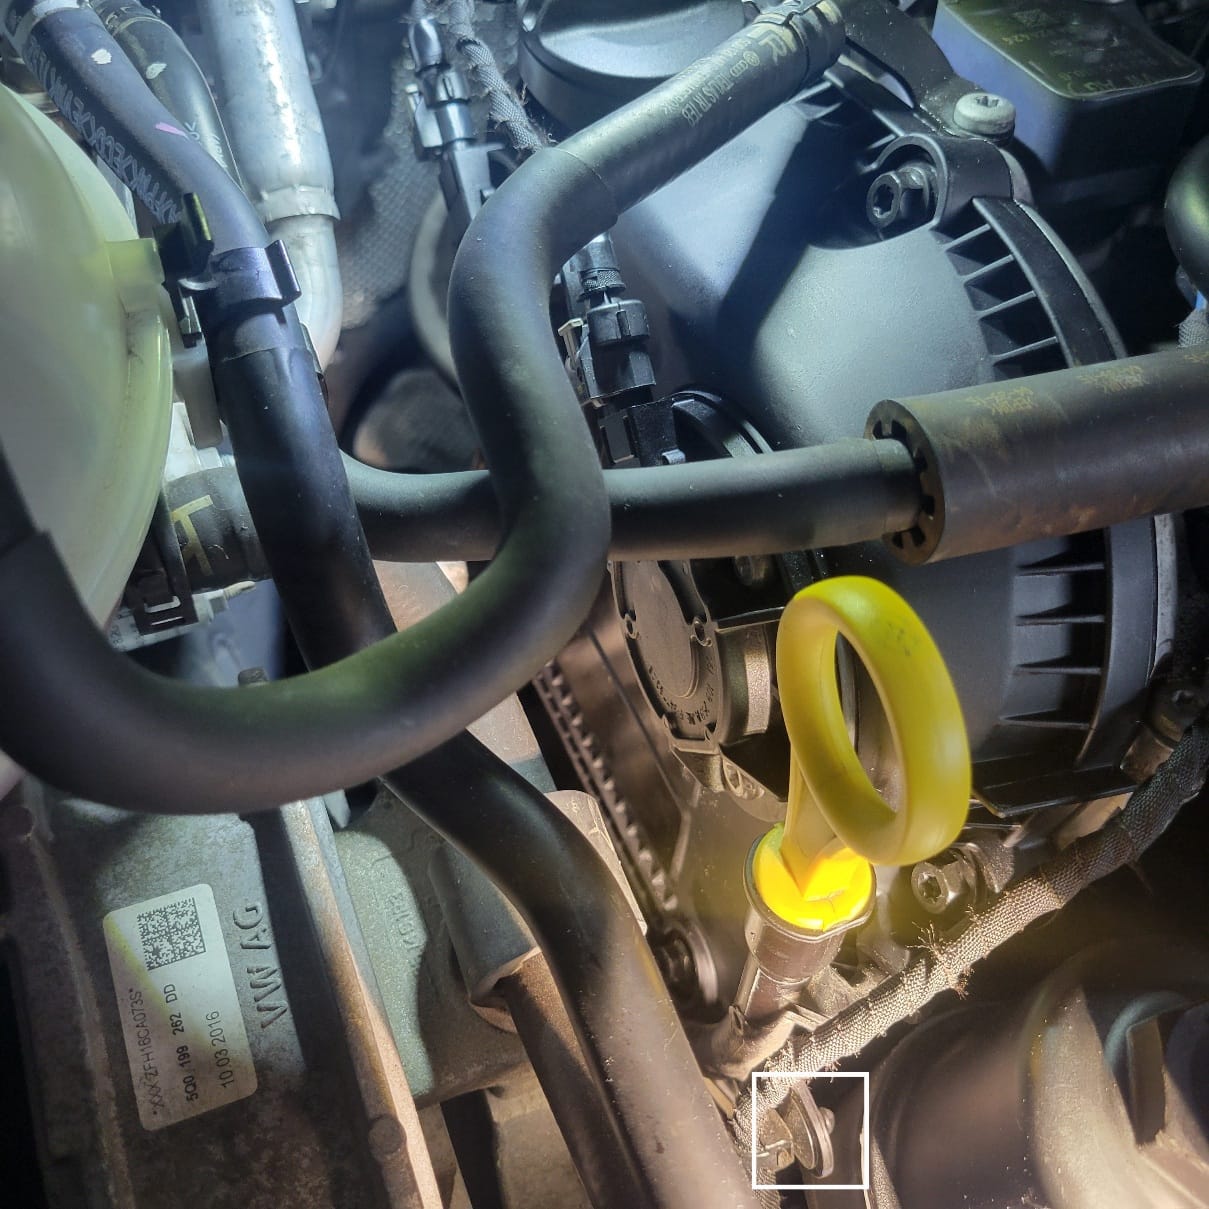
There is another plastic clip the dipstick tube is connected to outlined in the picture above. With this, the dipstick tube should be able to be moved out of the way.
Now you can remove the six bolts (three each) holding the camshaft magnets. Carefully pry the magnets out. They like to pop out and drop down the engine bay.
This will give you the most room for removing all of the bolts for the upper timing cover. The bottom two bolts are the worst to get to. Use the thin open ended wrench to work the two bolts lose. I could not get my fingers on the bolts to spin the bolts and had to slowly wrench them out. Unfortunately, the Harbor Freight flex-head ratchet will not fit in the bottom space, but does make easy work of the other four bolts that hold the cover on. The bolts are locked onto the cover itself and will not need to be removed completely to remove the cover from the engine block.
With the bolts backed out as far as they will go, carefully remove the cover. This is easier said than done and will require a bit of finesse.
With the cover removed (sorry no pictures of that), be sure to clean the mounting surfaces where the seals rest with a shop towel. Now is the perfect time to replace the two camshaft magnet seals with a pick. Remember to move over your oil cap to the new cover as well.
Installation is the reverse. The bolts like to get in the way while you work the cover into place. Do not try to force anything too hard and be careful of the seals being moved out of place.
Hand tighten and then torque the six cover bolts in a star pattern. The final torque specs for these bolts is 9Nm. Clean and reinstall the two cam magnets and replace the six aluminum torx bolts. These torque to yield bolts must be torqued to 4Nm then turned an additional 45 degrees.
Replace the bolt for the oil dipstick tube, replace the coolant hose, and you are all done!