Virtualize pfSense for Google Fiber - A Dream Networking Stack
This is a story of planning and executing on a networking re-design utilizing Google Fiber, pfSense virtualized in Proxmox, and Ubiquiti products.
I recently moved to my first home and immediately started planning improvements to the networking situation. This is a story of planning and executing on a networking stack re-design utilizing Google Fiber, pfSense virtualized in a Proxmox hypervisor, and some Ubiquiti products to boot.
Fixing the Wiring Cruft
Upon moving in, I wanted ethernet runs to the rooms used for my office and lab. Fortunately, the home was wired with Cat5e homeruns to the rooms but they were terminated as RJ11 (phone) jacks. So first things first, I re-terminated the Cat5e as RJ45.
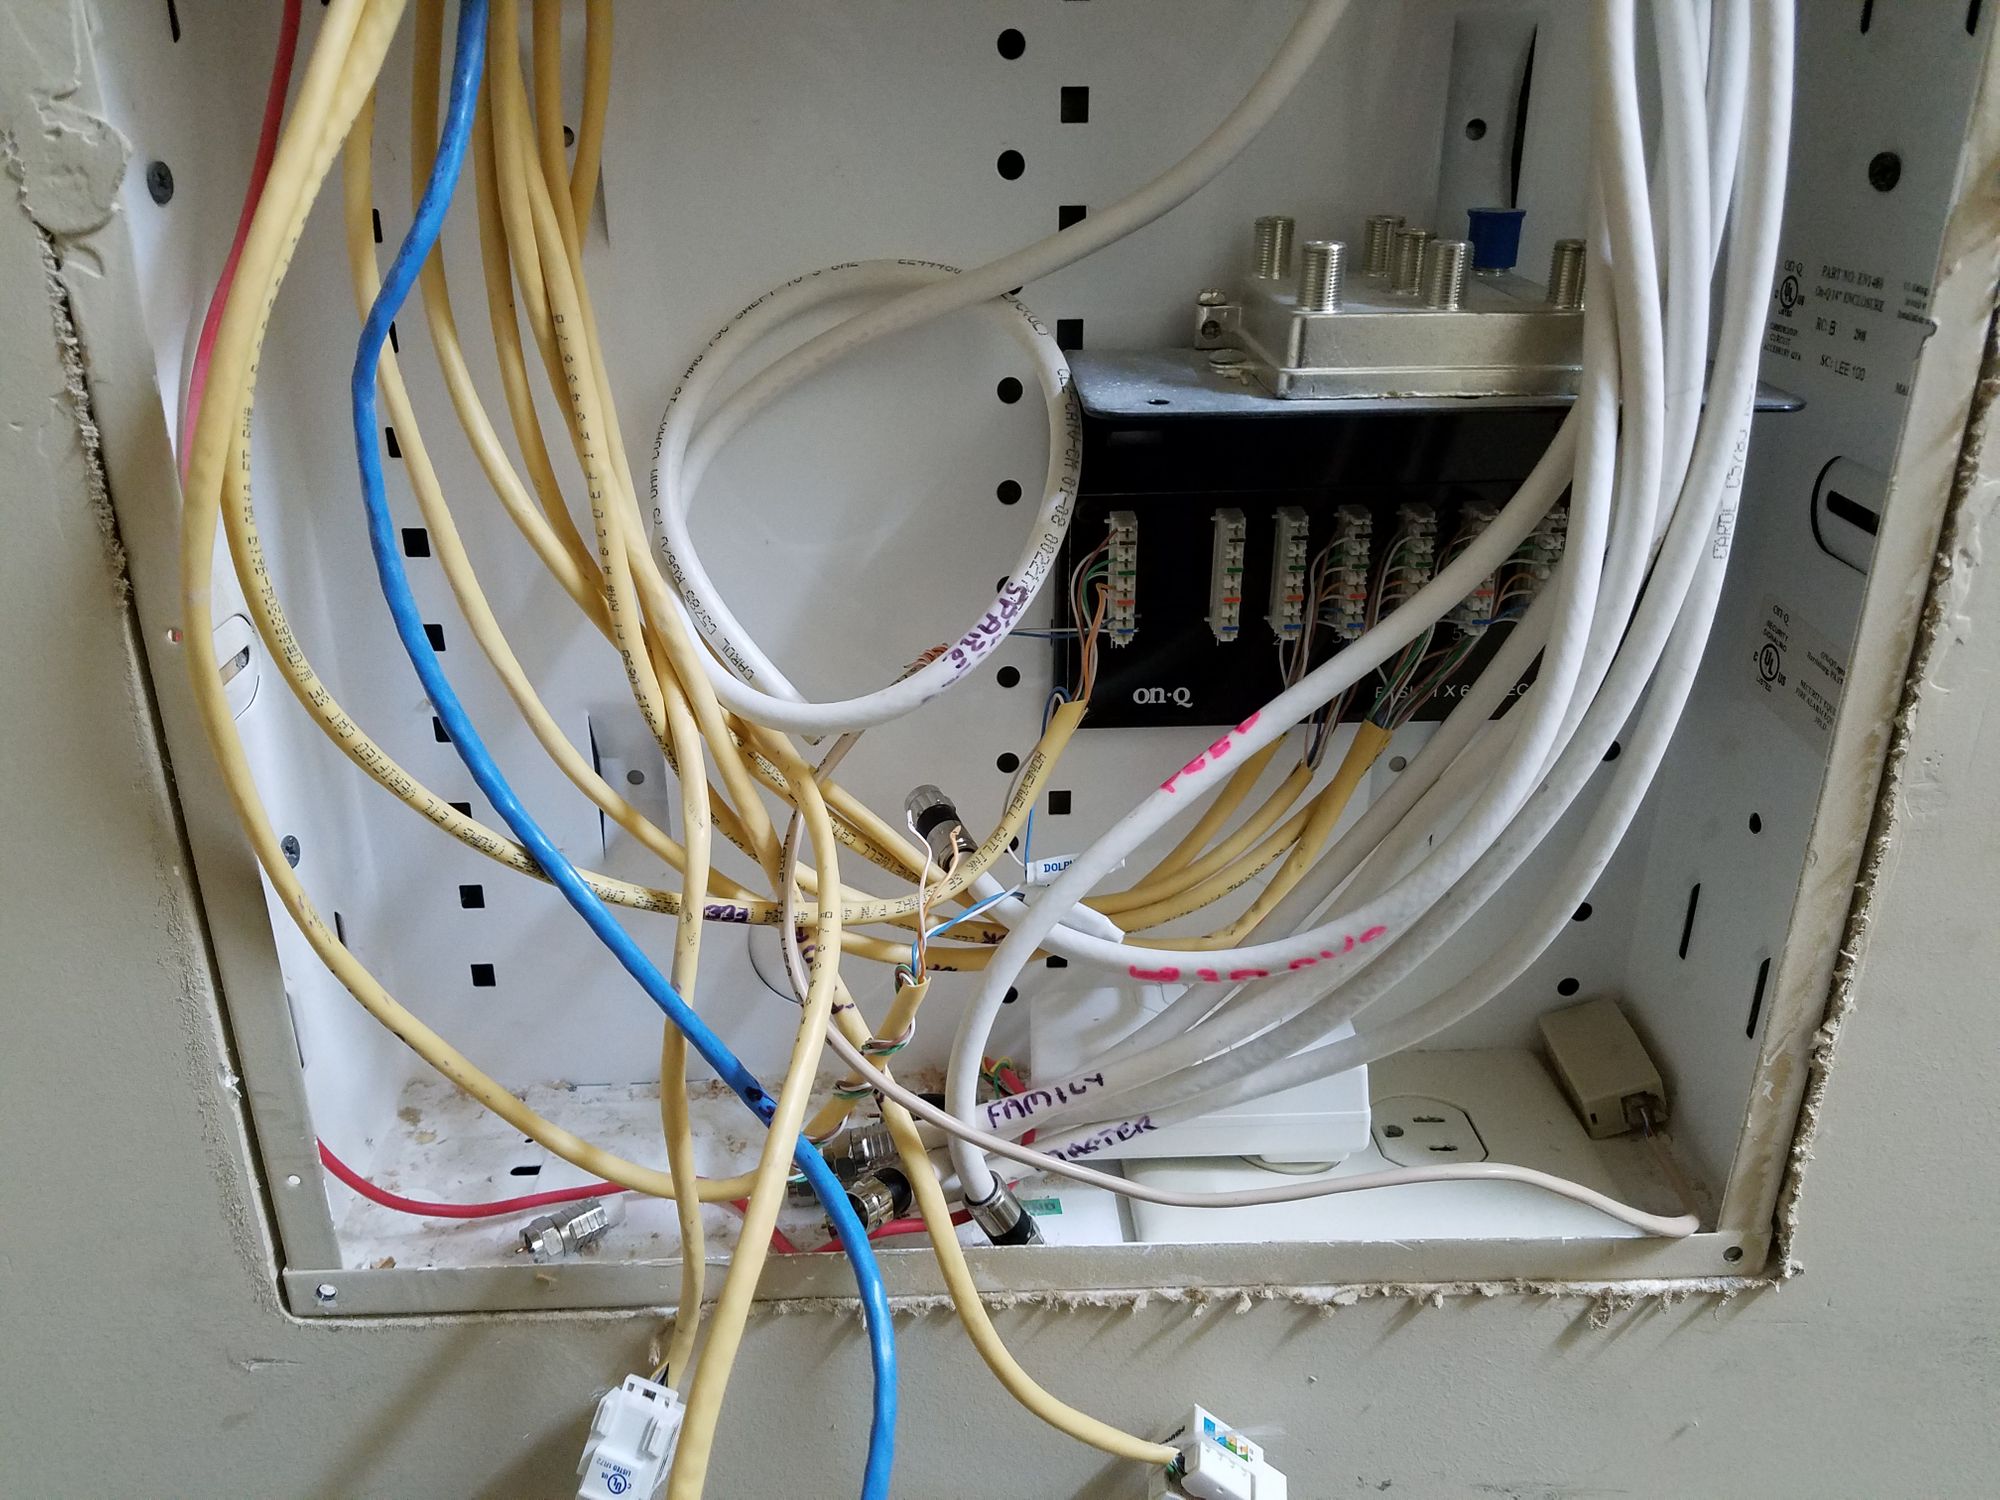
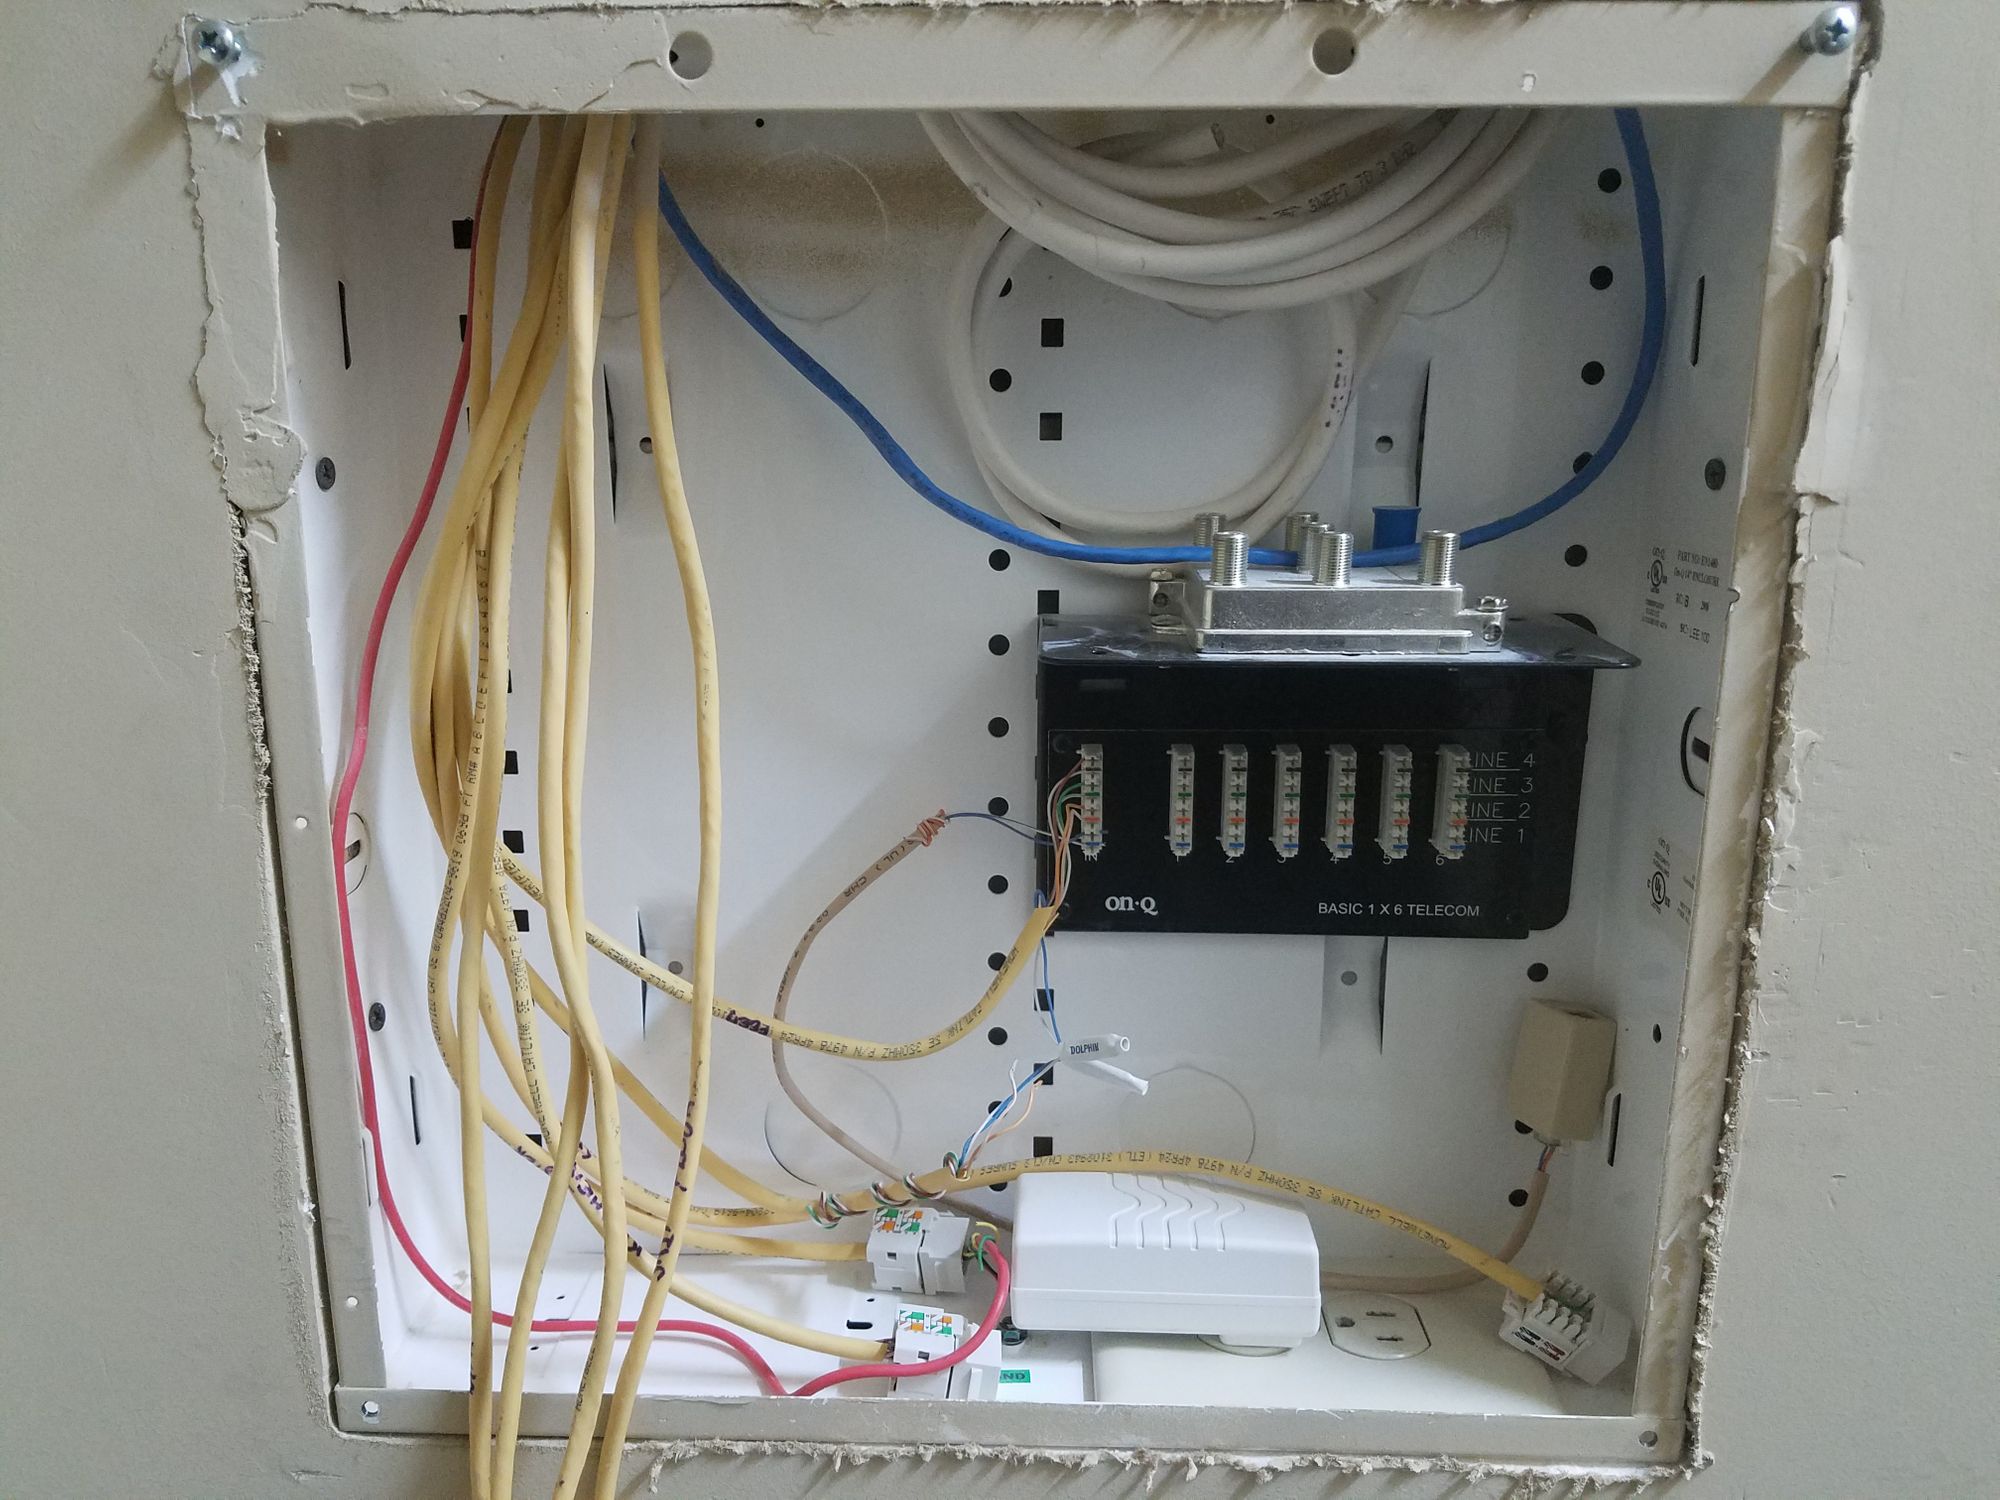
There was no way I could have relied on WIFI for all my hardware and service needs. So this was an easy first win, in my books!
Google Fiber
I have access to the amazing Google Fiber in my area. So this would be the foundation for me to build my networking on. I used the Google Fiber router for a few months but always felt the pull to go back to the more advanced routing of pfSense which I had deployed in the past. It is difficult to not feel like you are missing out with proper VLAN tagging and management, firewall rule definitions, VPN integration, and IDS which pfSense offers in its ecosystem. So with that in mind, I began my R&D.
Hardware Utilized
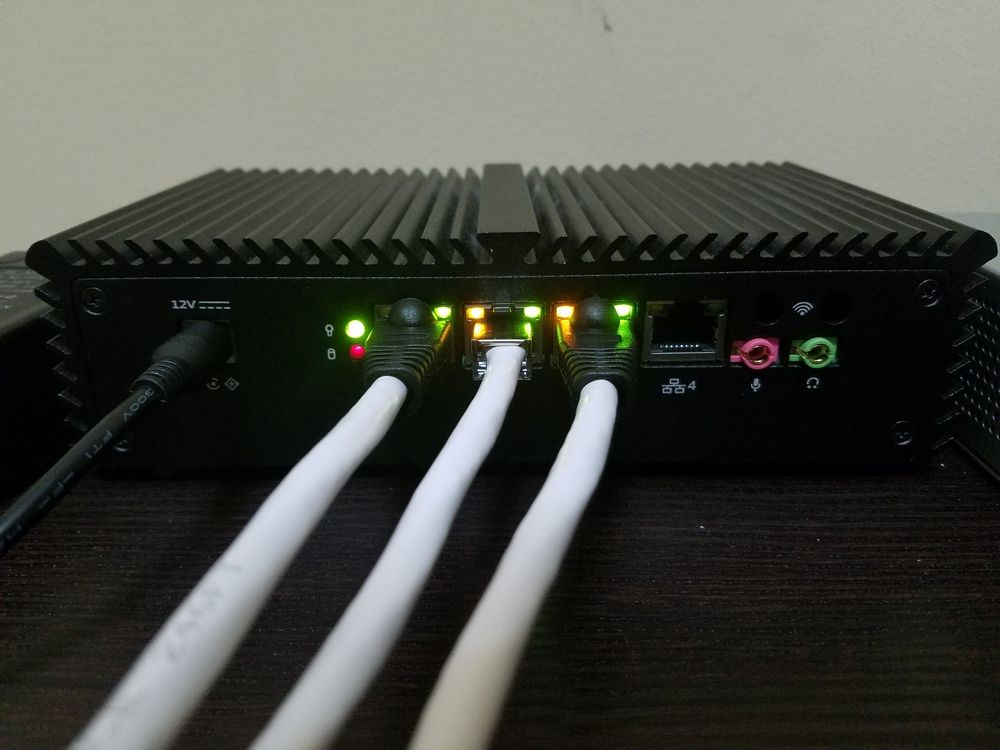
pfSense runs nicely on commodity hardware (although some would argue as long as Intel NICs are used, along with a CPU which supports AES-NI). In the past, I used a Qotom Q355G4 to run pfSense and it worked reasonably well. Outfitted with 8GB of DDR3, 4 x Intel I211 NICs, and an efficient Intel i5-5200U processor, it is able to handle routing traffic along with a surprising amount of layer-2+ services in parallel.
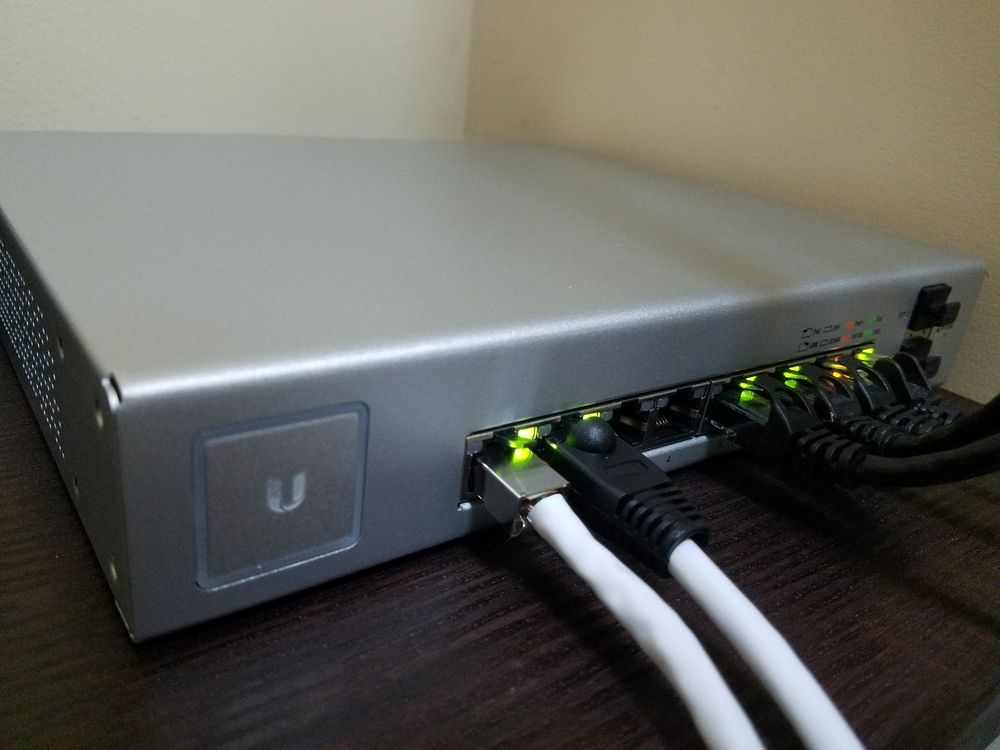
In addition, I purchased a US-8-150w switch and a UAP-IW-HD access point from Ubiquiti to supplement the AP-AC-PRO I had already.
Virtualizing pfSense
The idea of running pfSense under Proxmox was very appealing to me. The benefit being able to manage pfSense in a VM and to be able to offload some of the network interface details to the hypervisor. This would allow pfSense to only concern itself with the routing and application layers. Also, I will be able to easily and, most importantly, quickly backup and restore the VM during upgrades or testing of functionality. Finally, this would allow me to deploy additional services such as Pi-Hole and the Unifi Controller on the router itself.
This is the design I came up with:

There are some interesting concepts in this design which make it really resilient and performant. The first being the usage of a static management port connecting to Proxmox. This allows an admin to connect directly to the host, using either SSH or the Proxmox Web GUI, for debugging of any VM or hypervisor detail. So if something goes wrong on the network, I can always patch in directly to the router and fix it.
Next, the usage of Open vSwitch bridges and bonds makes it really simple to create aggregation groups and virtualized switches. This hides a lot of the implementation details from pfSense and thus configuration is much simpler. In this case, I will be using 1 port for WAN which goes to the Google Fiber jack, 2 ports for LACP to the US-8-150W switch for LAN, and finally the last port is reserved for the management access.
The final benefit of this design is the usage of LACP to the switch. This not only increases the theoretical throughput to the router to 2Gbps but also adds some failover in case one of the links in the group goes down.
One proposal I had planned was to use an OVS IntPort in order to tag all outbound packets with VLAN2, as required by Google Fiber. Unfortunately, this did not work as planned and I eventually did this configuration in pfSense, as we will see below.
Executing on the Proposal
I setup the router separately before switching out the Google Fiber network box. Obviously, you will want to create the pfSense VM before exchanging the hardware. Next, I configured the Ubiquiti gear and the LACP trunk ports to the switch. Last, I installed all supplemental services, such as Pi-Hole.
Promox Installation and Configuration
Installation of Proxmox is very straightforward. Here is my final network configuration as indicated in the proposal.
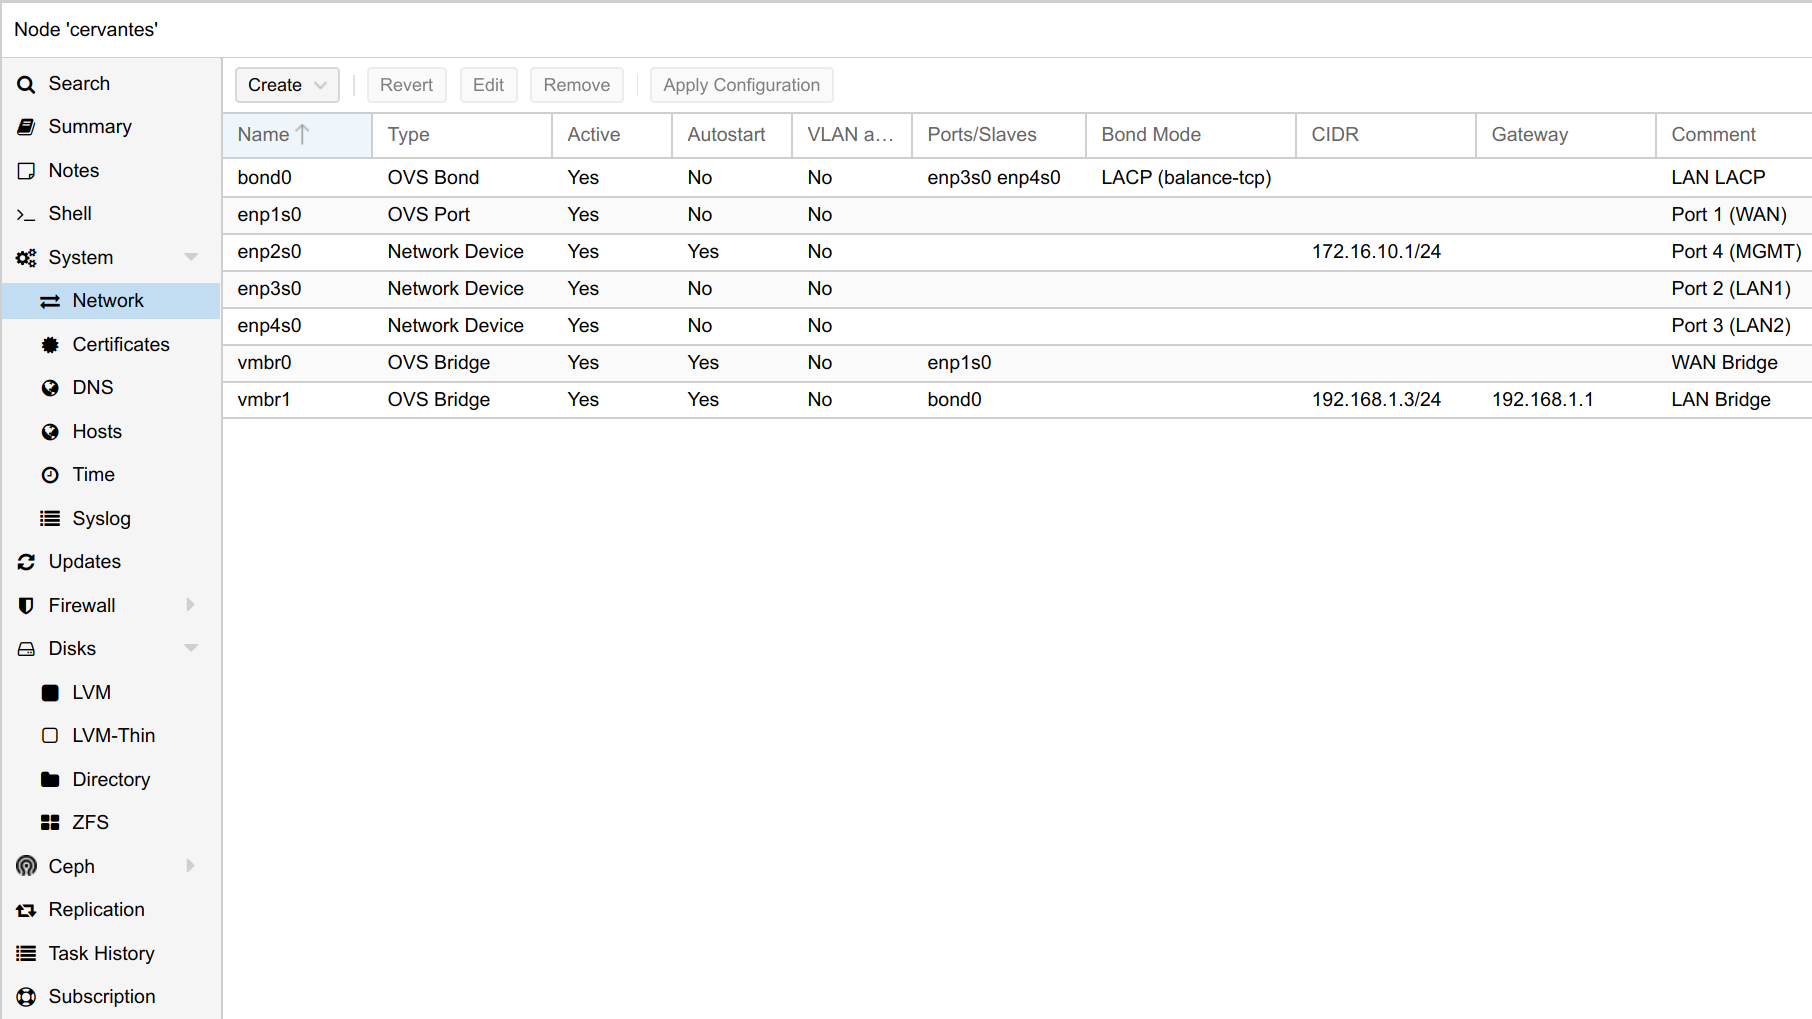
You should put the OVS bond interface in active-backup mode until you can configure the downstream switch for LACP. Then and only then, change this setting to LACP (balance-tcp). This is where the management port comes in handy!
You may also notice that the NIC ports on the Qotom are not represented on the hypervisor host in the order that they are laid out on the chassis. I put a comment on each interface to know which physical port it is mapped to.
pfSense VM Creation
I followed this guide for virtualizing pfSense within Proxmox. The following are the resulting Virtual Machine details I used for pfSense.
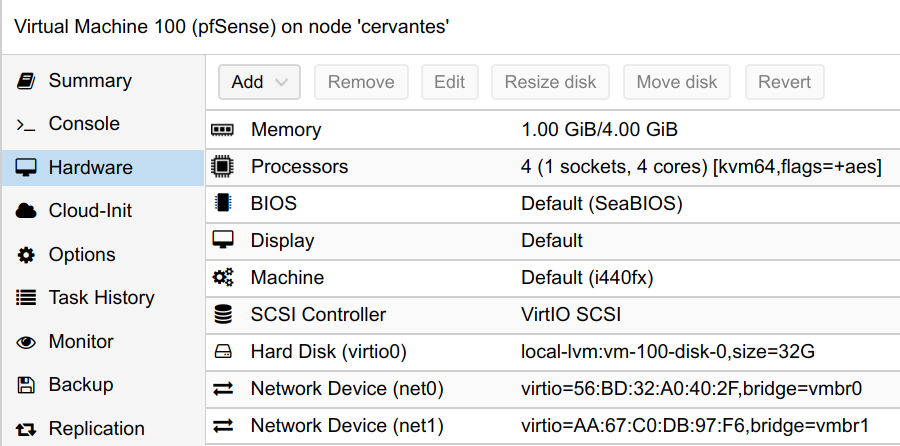
In the advanced options, when setting up the CPU, you may enable the AES flag for the VM, if your processor supports it. Also, I decided to use ballooning for the memory configuration from 1GB minimum to 4GB maximum. Finally, make sure you enable VirtIO on the HDD and network devices as this will greatly affect performance. As in the guide above mentions, I did have to disable hardware checksum offloading in pfSense.
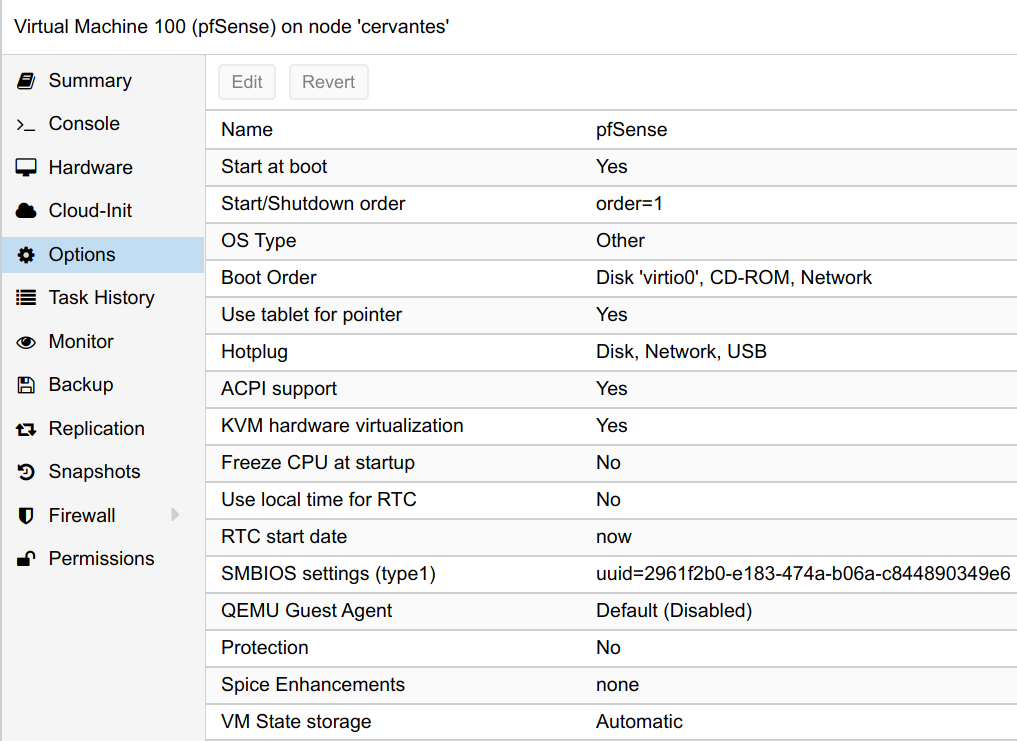
Also, be sure to enable the option to start the VM on boot and set a low order priority so that it starts before the other VMs and containers you have running on the hypervisor.
Replacing the Google Fiber Box
Replacing the Google Fiber network box was straightforward but did require resolving a few issues.
Like I said prior, my initial goal was to use the Open vSwitch IntPort to tag the outbound packets with VLAN 2. But this turned out to not work for a reason which I did not bother to spend time on. Instead, I followed this guide which configures the tagging within pfSense and the IntPort is mostly default and unused. As a side note, you could probably get away with using a simple bridge for the WAN in Proxmox instead.
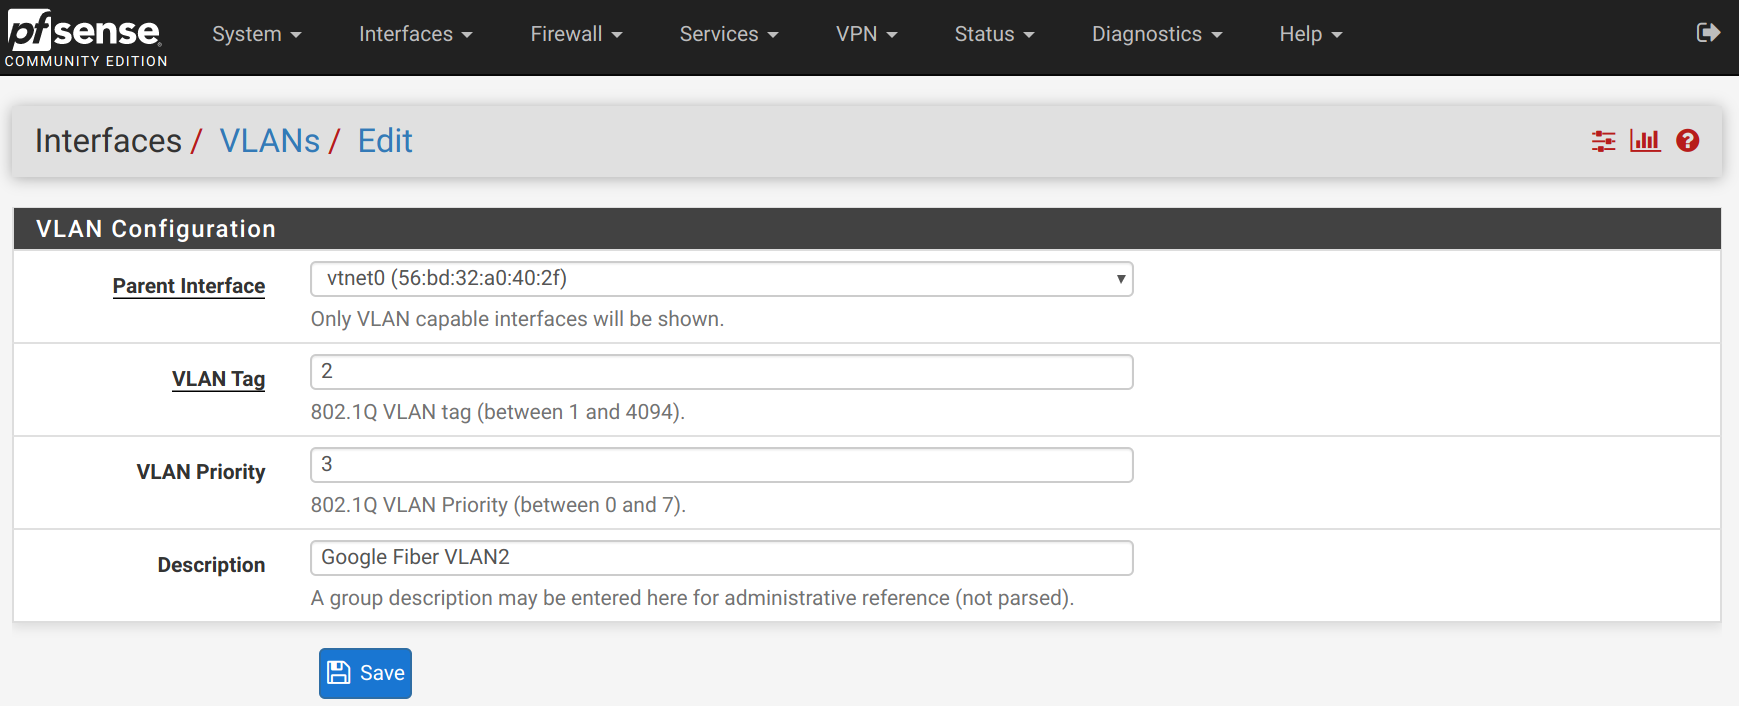
Within pfSense, create a VLAN interface with tag 2 and priority 3. Set the parent interface to the current WAN network interface.
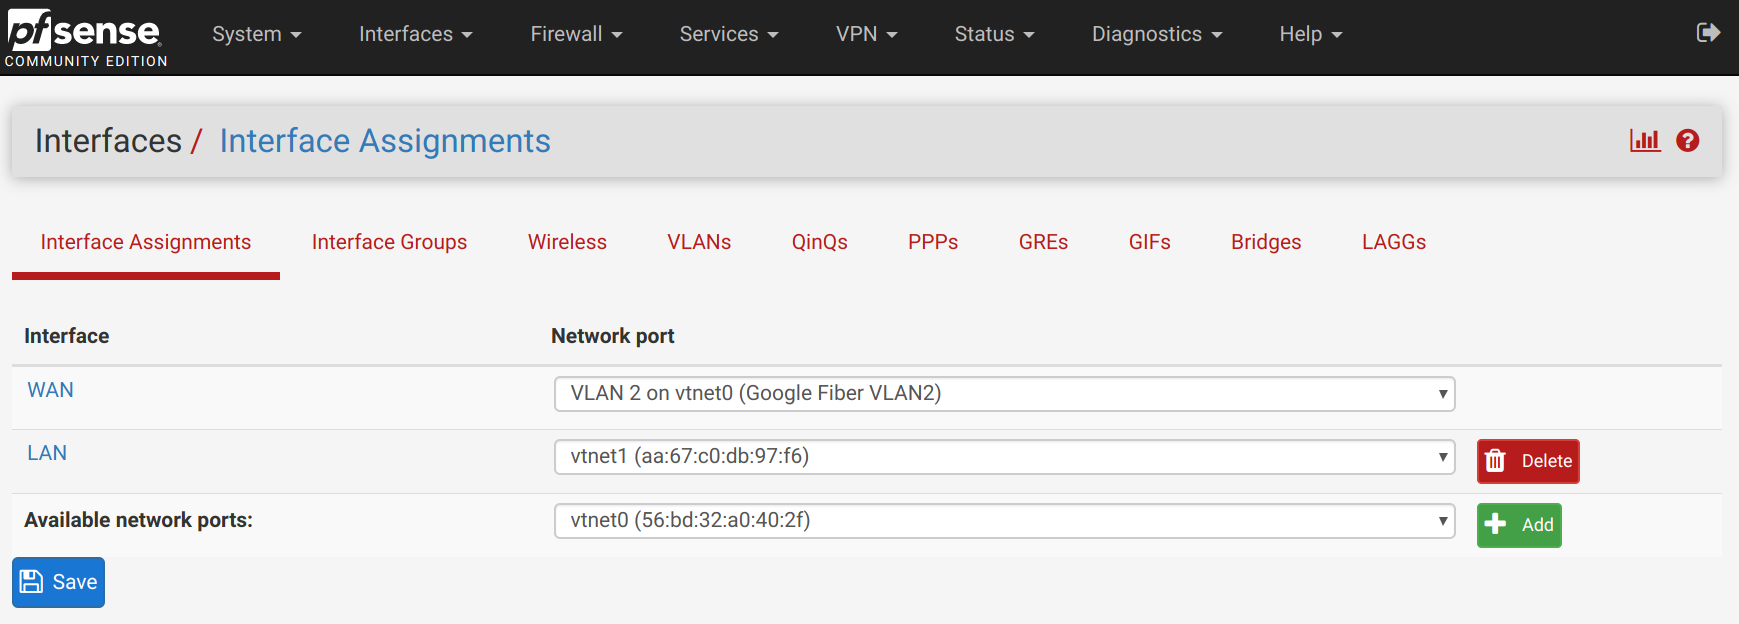
In the Interface Assignments page, change the WAN assignment to the new VLAN 2 tagged interface.
Finally, you will want to power down the Google Fiber fiber jack for several minutes. This seemed to be required for pfSense to receive another WAN IP address from Google upstream.
Unifi Switch Configuration
At this point in time, I had internet access but I still had the bond configured as active-backup. So, I created a LXC container within Proxmox and a nested Docker container within it to run this Unifi Controller container.
After setting up the controller and adopting all of the Ubiquiti gear, I setup LACP on the Unifi switch.
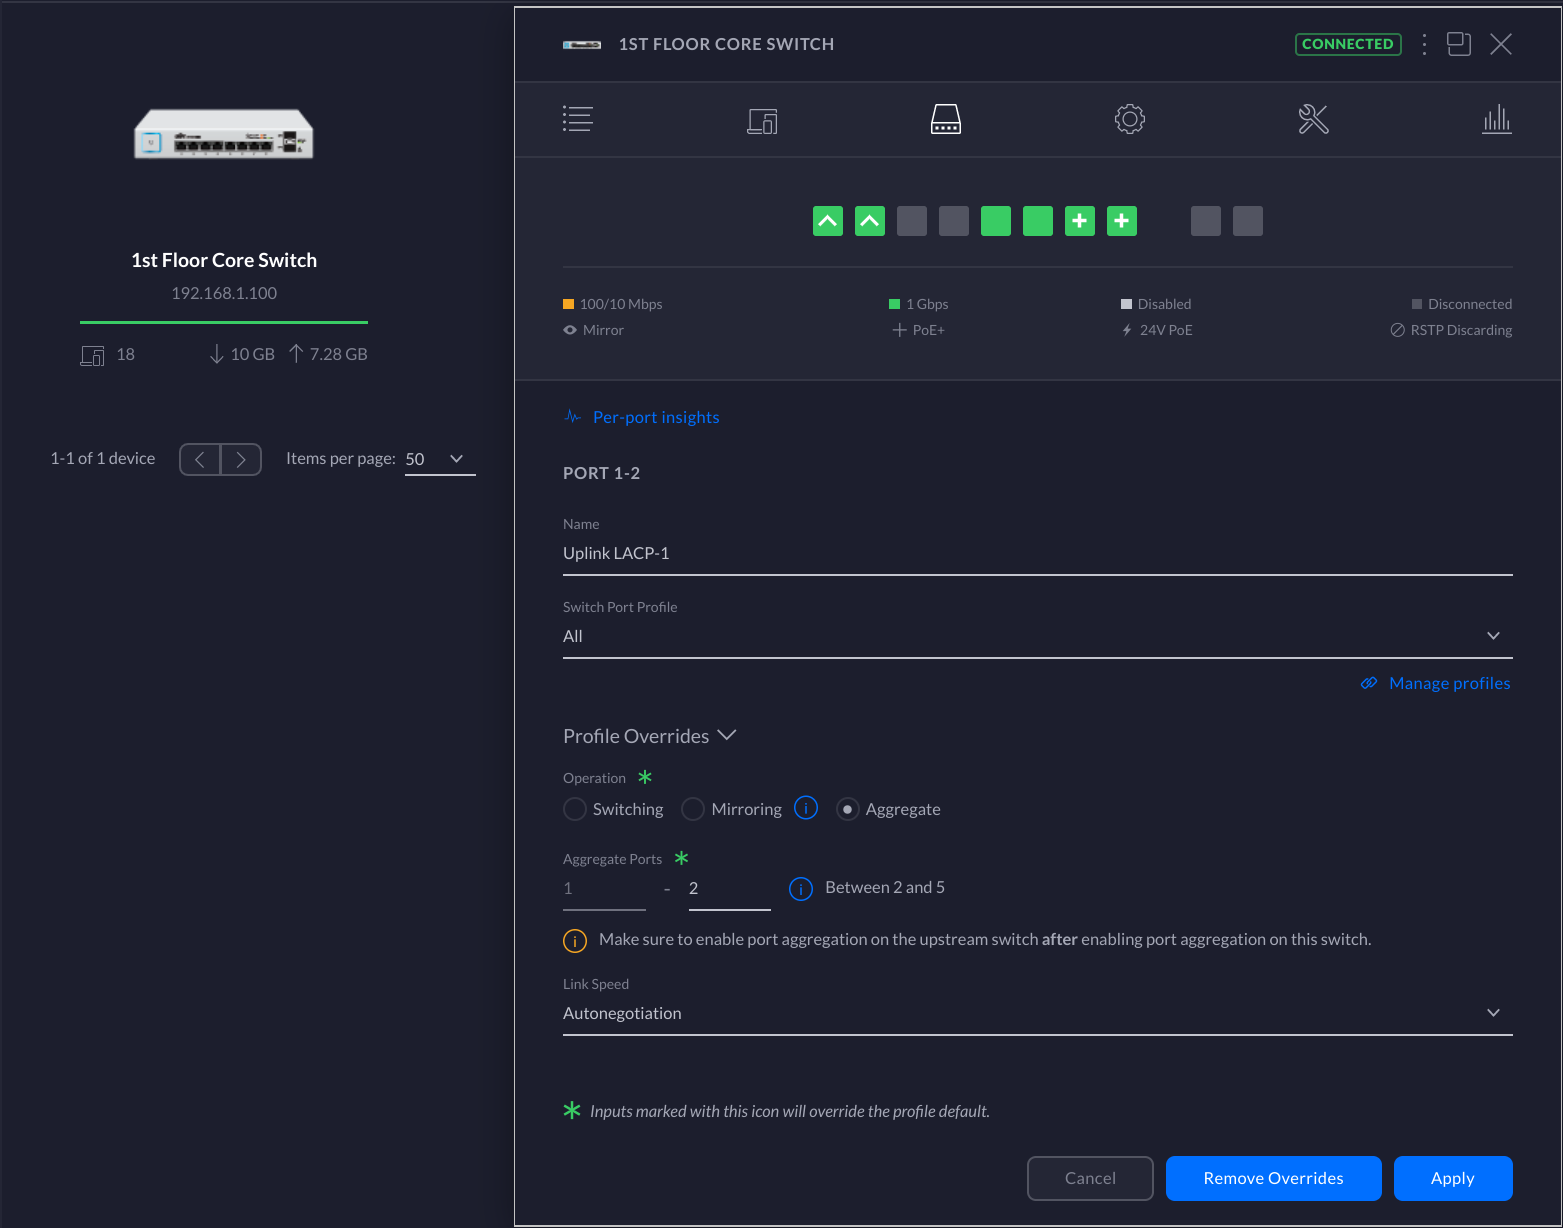
Then I used my management port to change the bond mode to LACP (balance-tcp) within Proxmox. And viola!
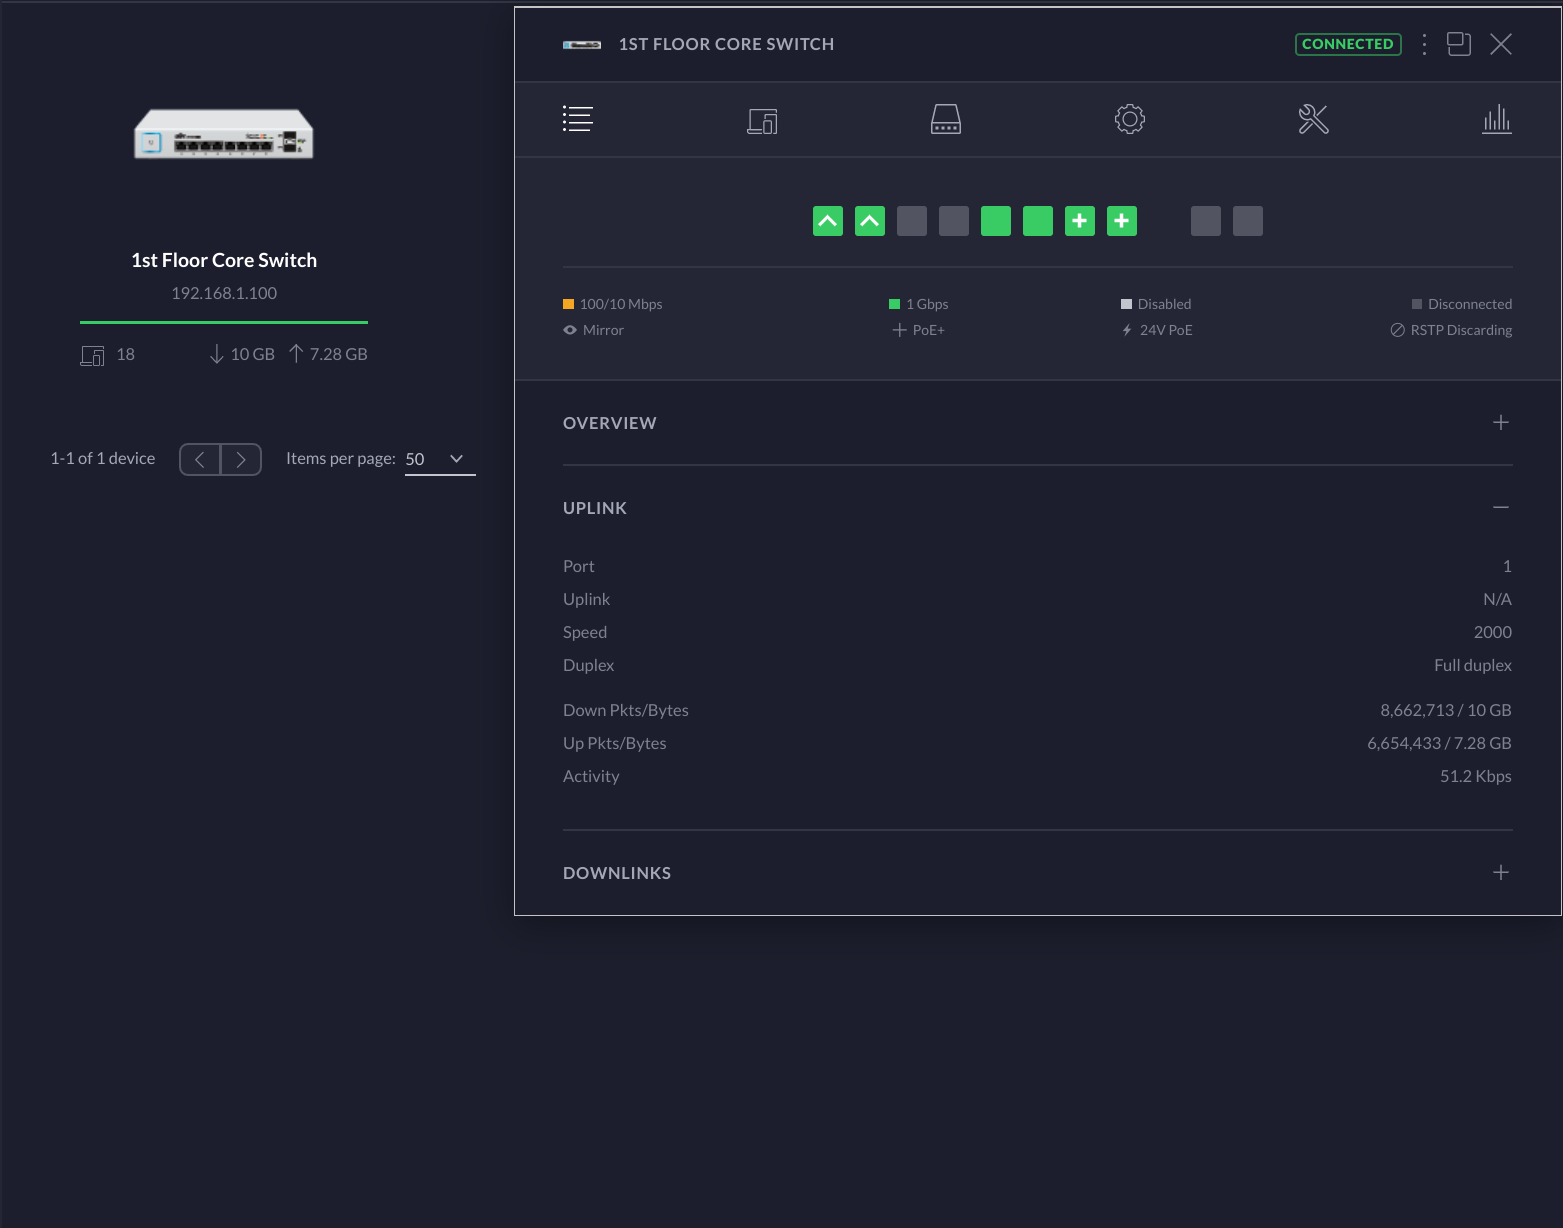
The Unifi Controller service is really powerful and something that I had not used prior to this endeavor. It has a lot of insight into the network details and has a great overall user experience. I will definitely be spending a lot of time in this UI in the future.
Finalizing the Configuration
In addition to all this, I created another LXC container on the Qotom to run Pi-Hole. Then set the pfSense default DNS server to be the Pi-Hole and set the DNS resolver to forward all requests to it.
The final static IP mappings and network services which are accessible from the LAN look like:
- pfSense Web UI - https://192.168.1.1
- Pi-Hole Web UI - http://192.168.1.2/admin/
- Proxmox Web UI - https://192.168.1.3:8006
- Unifi Controller Web UI - https://192.168.1.4:8443/
Conclusions and Future Work
At this point, I have so much more insight and configurability into my home network. The Ubiquiti products make it really simple to see weak points in a home WIFI network such as those caused by interference or inadequate coverage. In additional, pfSense has loads of functionality which I still need to go through.
For those that are wondering, I am seeing 940Mbps download and 750Mbps upload and the Qotom is not breaking a sweat.
Finally, there are certainly improvements I will make in the future, such as:
- Intrusion detection using Snort or Suricata
- Forwarding firewall events to Elasticsearch
- Proper VLAN tagging
- OpenVPN
- Guest WIFI